No products in the cart.
Graphic Design, Tutorials
EZ Tip: How To Add Style To Your Text With Adobe Illustrator
One of the big challenges we face in graphic design is the speed at which results are delivered. This means we are sometimes incentivized to looking for ways to increase our productivity without sacrificing the quality of the final design.
Luckily, the Graphic Styles are here to save the day.
What are graphic styles?
Graphic styles are presets you can quickly apply to an object to change its appearance. It works very much like a template, but it is stored within a library that you can import in any other document via the Graphic Styles panel. You can use the default ones and you can also create your own.
Let’s learn how.
We’re using the following resources:
- Adobe Illustrator
- Alfa Slab One font (or any other thick font)
STEP 1
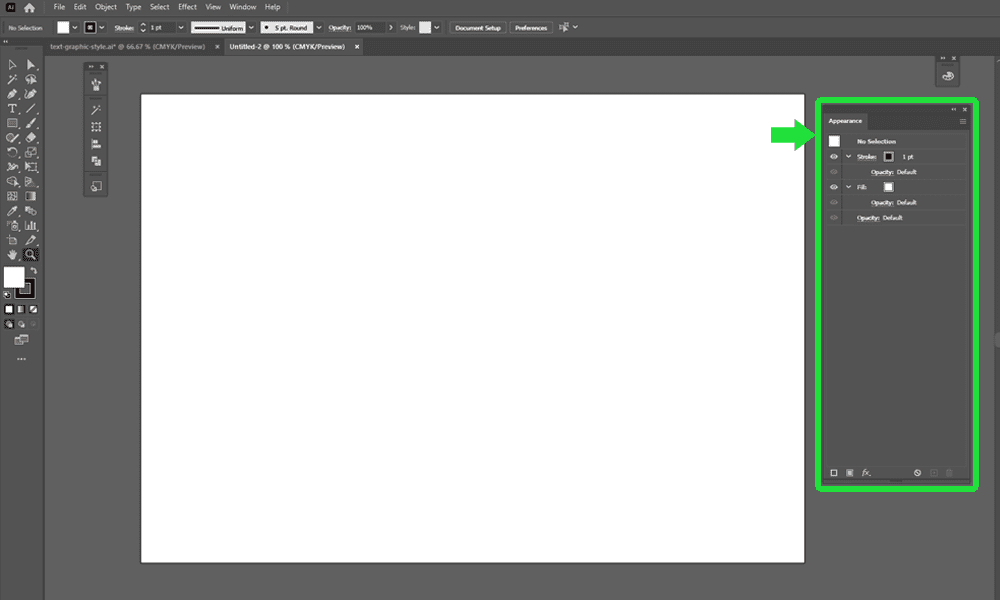
Create a new document. Bring up the Appearance panel.
Go to File -> New to create a new document and Window -> Appearance to toggle the Appearance panel.
STEP 2
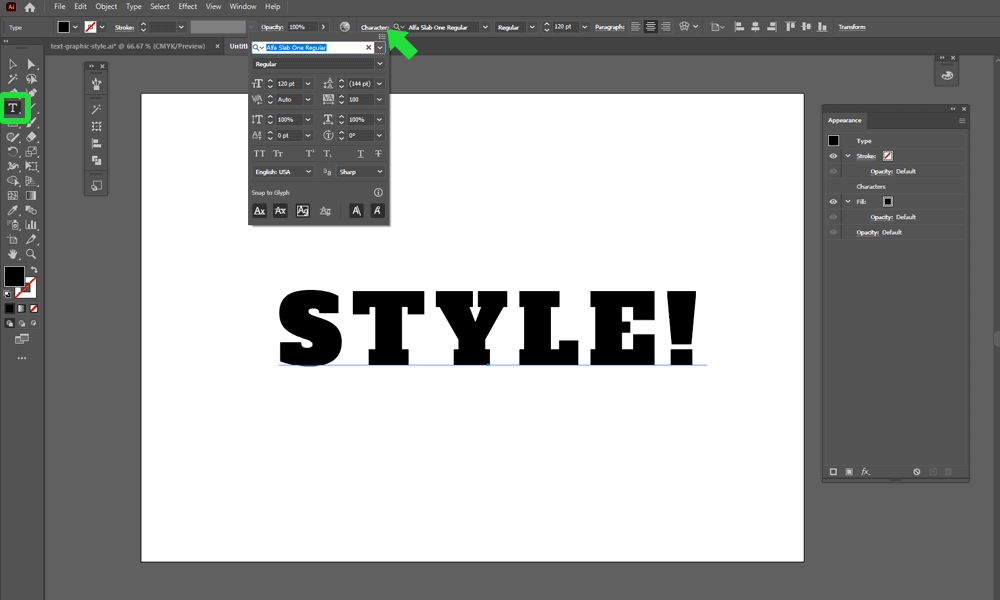
Add a type text at about 120pt size, hit Cmd + A to select the text and set its font to Alfa Slab One.
Grab the Type Tool (T), click on the canvas and write your title.
STEP 3
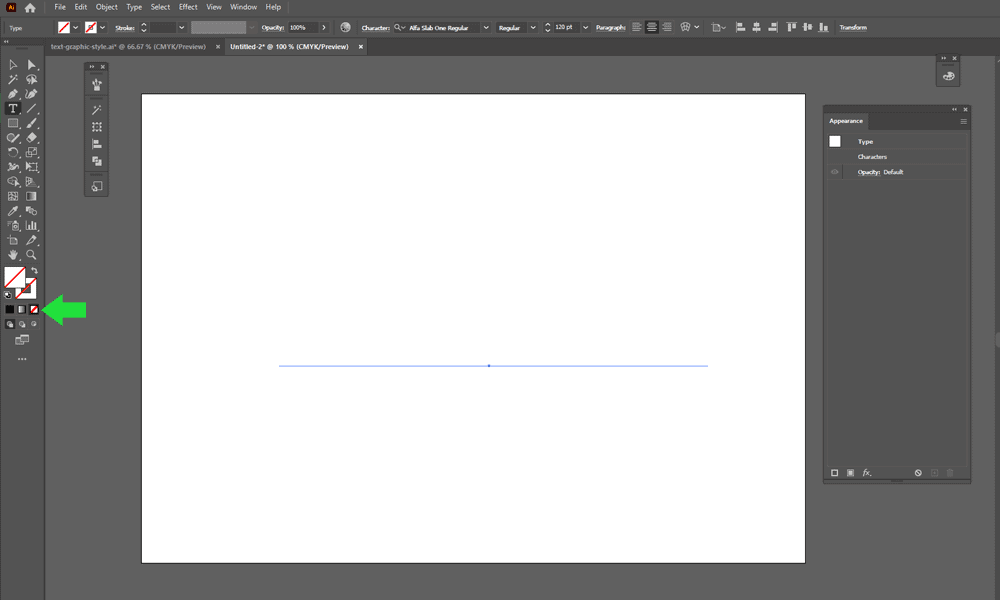
Remove the fill of the font. Don’t worry, it is still there, it’s just that it is hidden.
Click the “None” (/) button to remove it. If it doesn’t work, press X, first, then /.
STEP 4
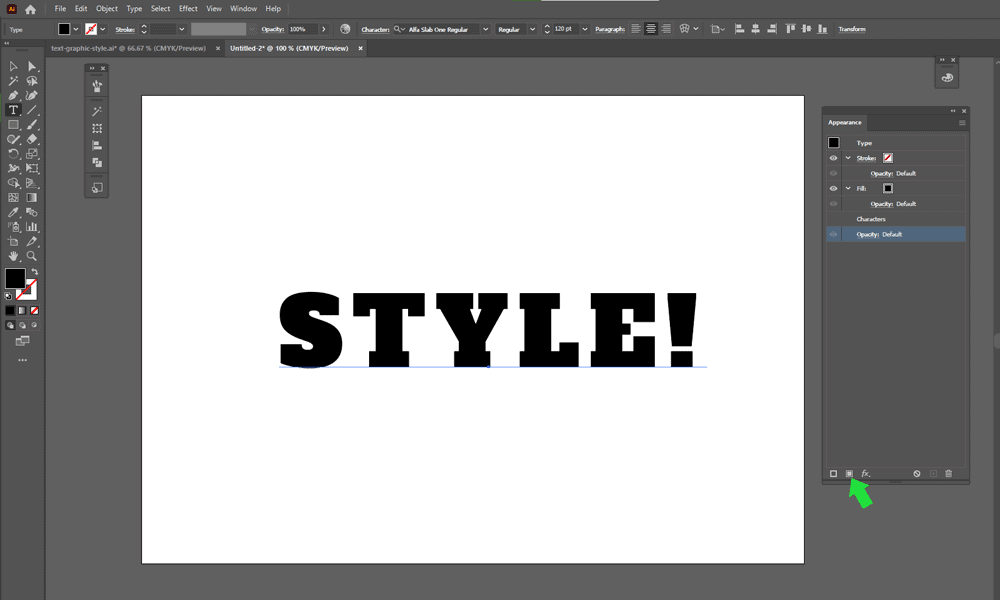
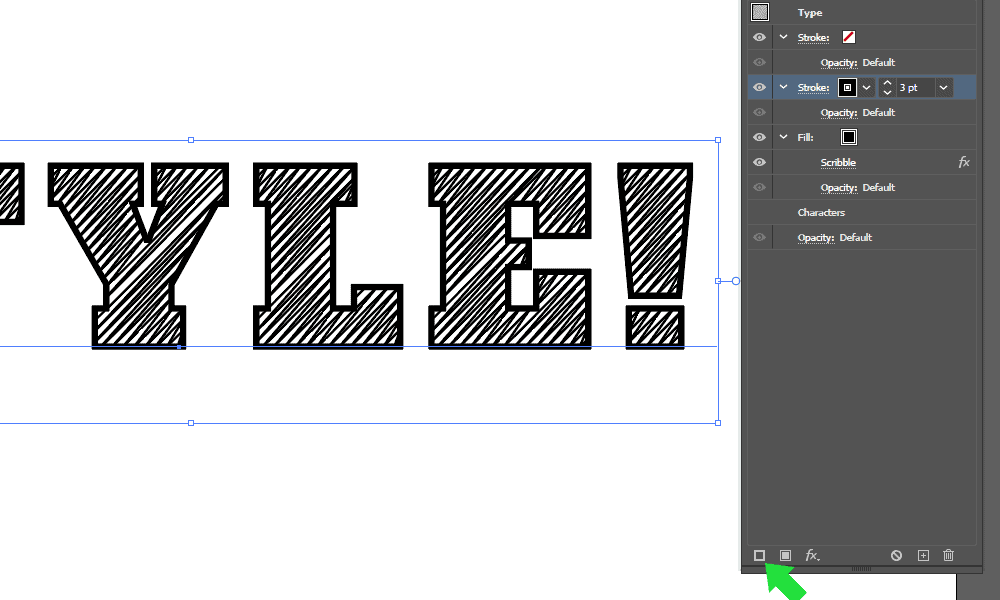
In the Appearance panel, click the Add New Fill button.
STEP 5
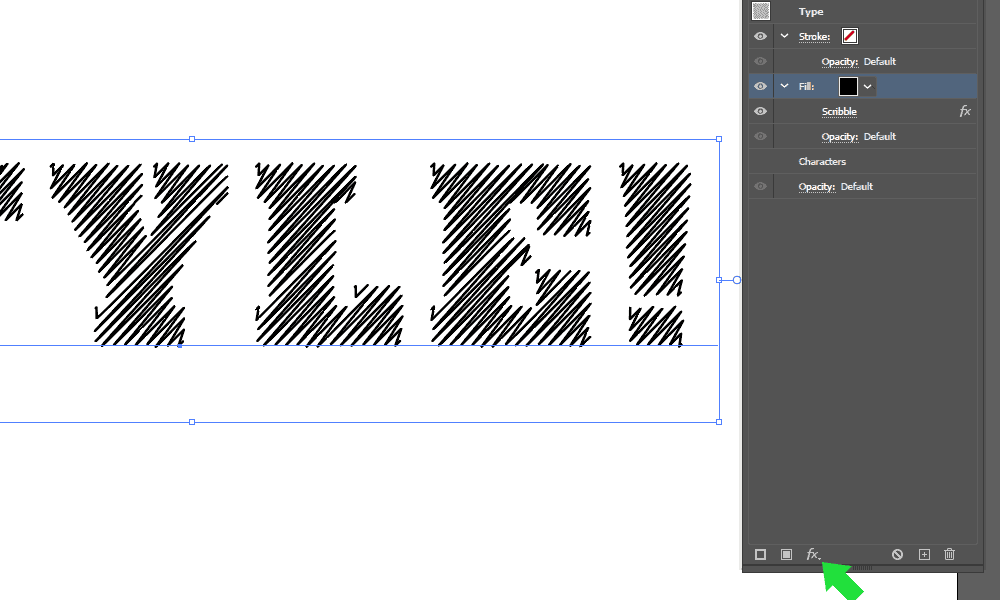
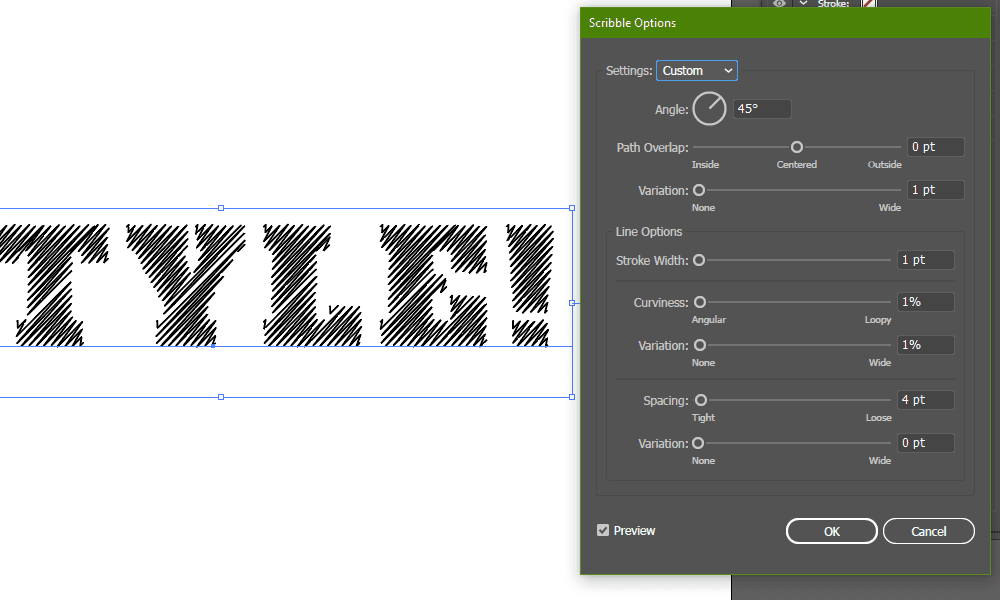
With the Fill selected, add a Scribble effect to it, to make it look hatched.
Click the ‘fx’ button -> Stylize -> Scribble with the values shown below.
STEP 6
Click the Stroke button and set the value of the stroke to 3 pt.
STEP 7
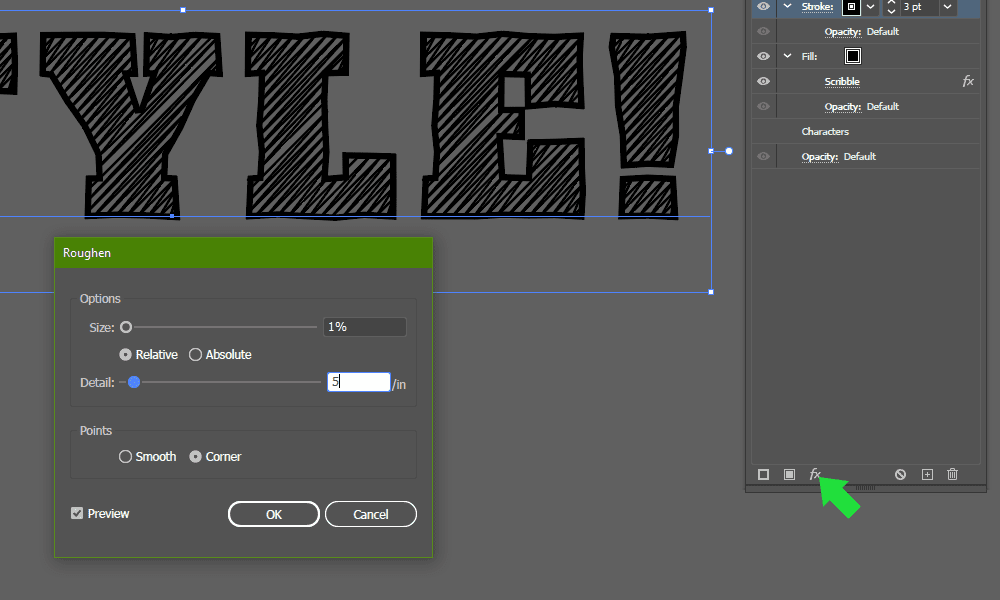
Pull the text out of the canvas or add a mid-tone gray background to reduce the visual contrast and to spot transparency easier. Add a Roughen effect to the Stroke, using the values below or similar.
Go to ‘fx’ -> Distort & Transform -> Roughen
STEP 8
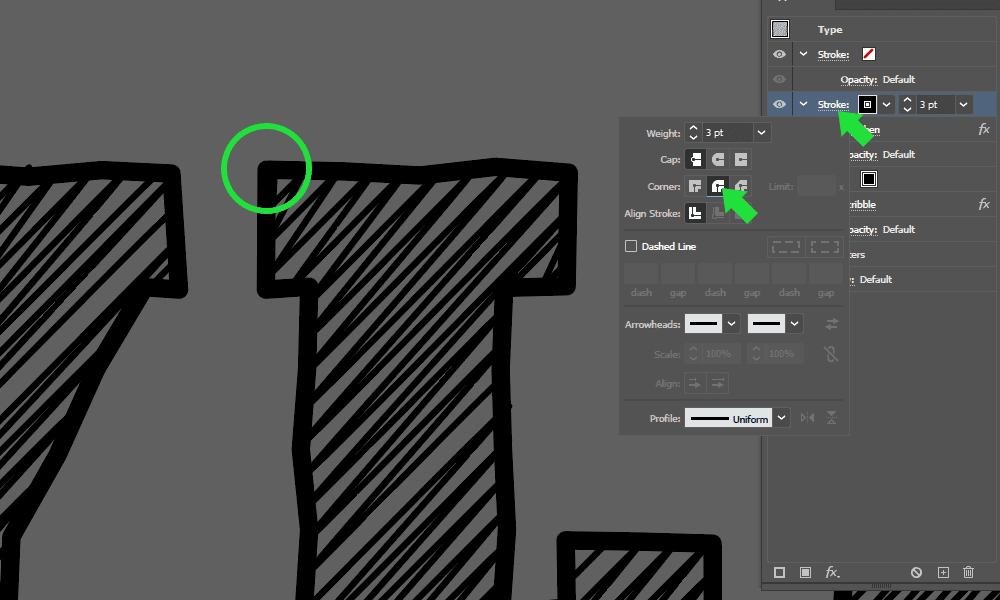
Click the ‘Stroke’ label and make the corners round.
STEP 9
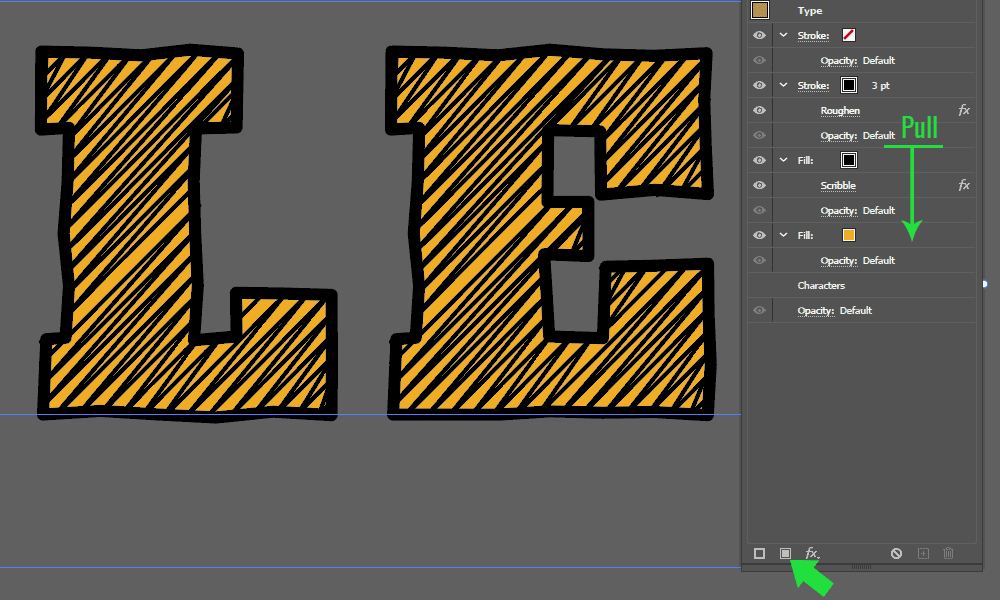
Add another Fill, change the color and pull it below the first one.
STEP 10
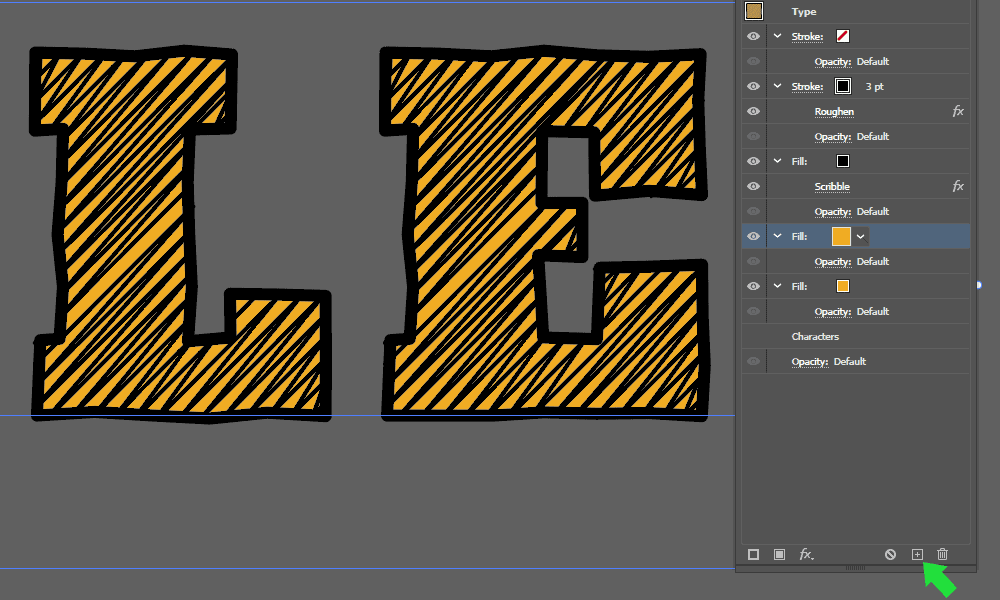
With the same Fill selected, click the Duplicate Selected Item button.
STEP 11
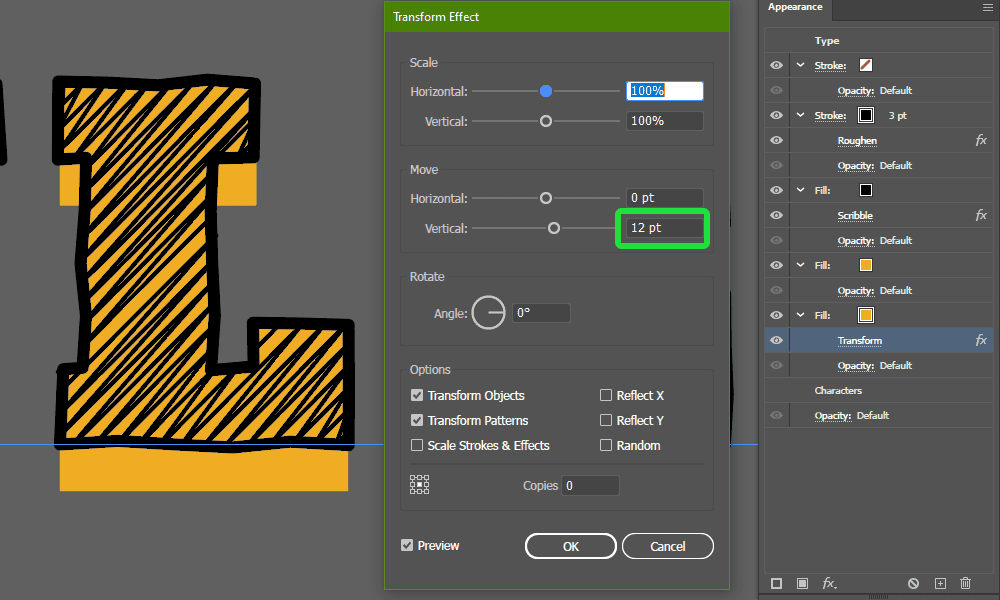
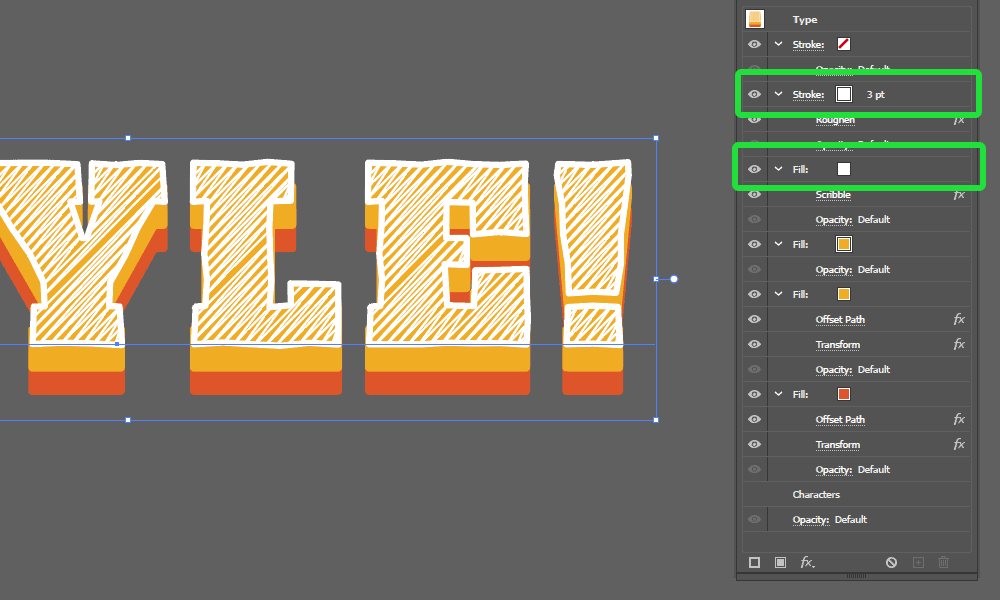
Add a Transform effect and move it downwards, with 12pt on vertical, as shown below.
Click fx -> Distort & Transform -> Transform
STEP 12
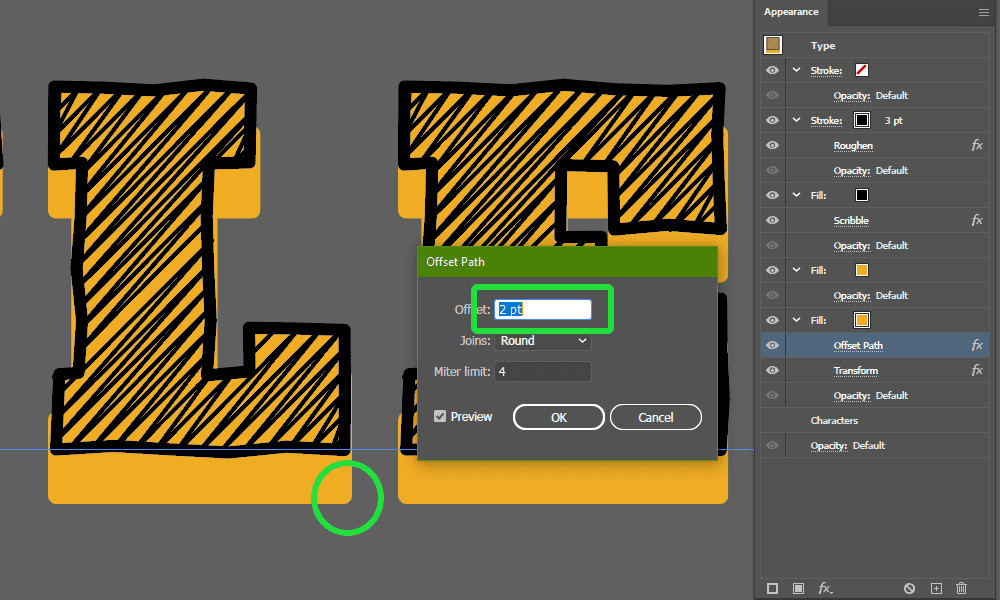
Add a 2pt Offset Path to make the corners rounder, with ‘Rounded’ setting for Joins.
Go to fx -> Path -> Offset Path.
STEP 13
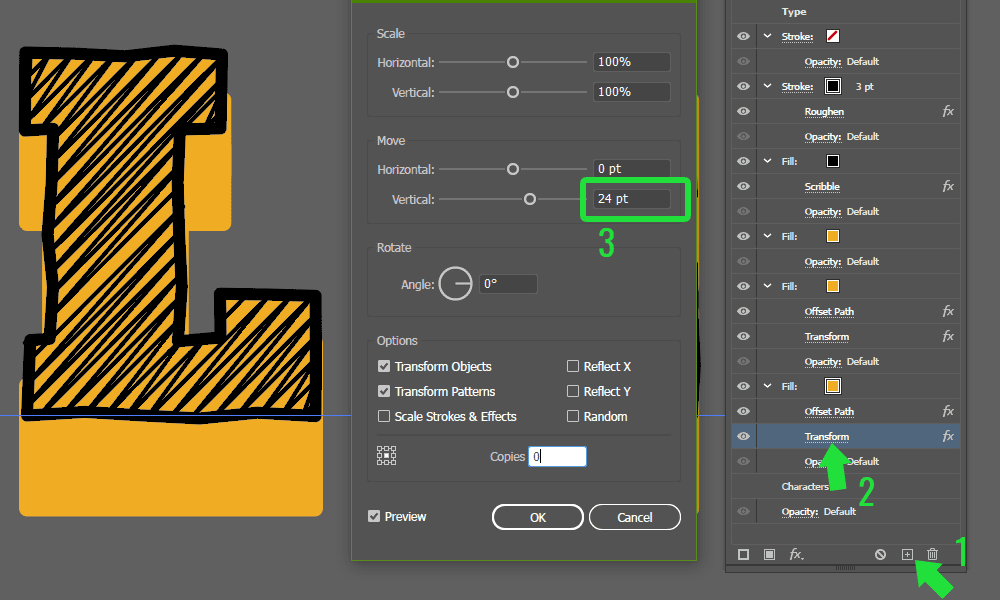
Duplicate this Fill, then change the Fill color to a bright orange and the Transform value to 24 pt.
STEP 14
Change the Stroke and the scribbled Fill colors to white.
STEP 15
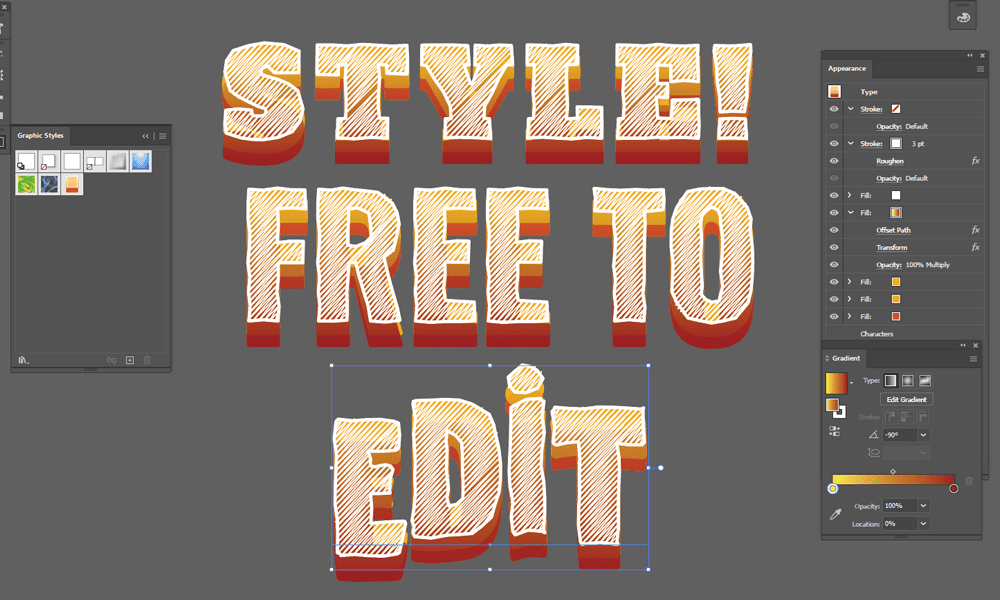
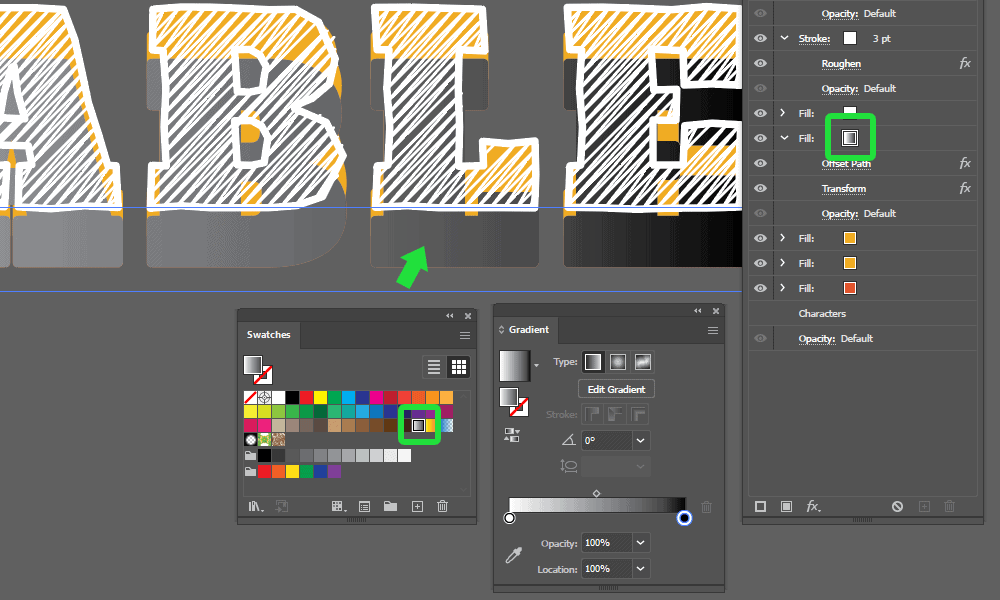
Duplicate the first yellow Fill and add a gradient to it.
STEP 16
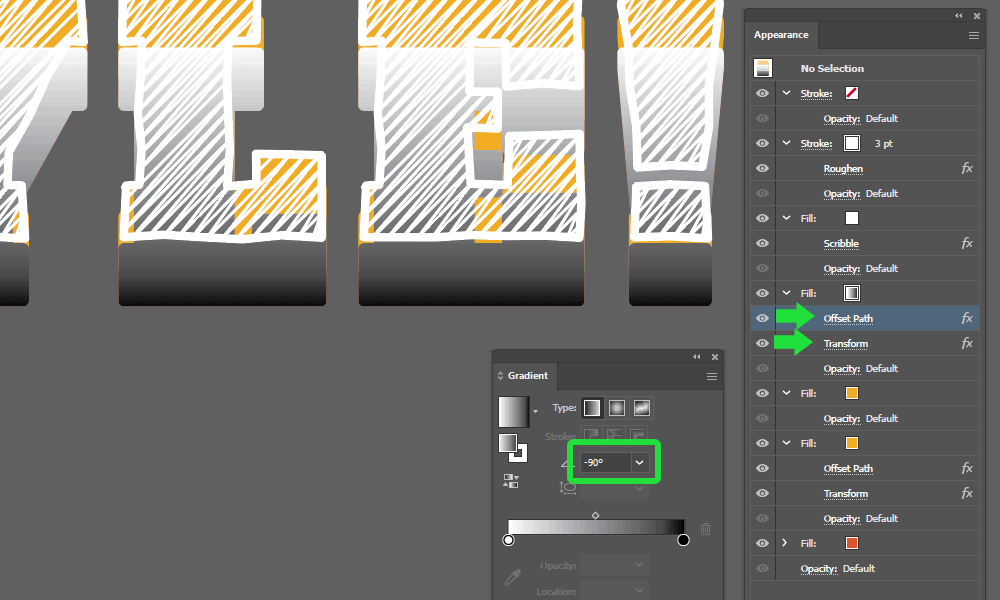
Set the Gradient rotation to -90 degrees and add a 24pt transform and a 2pt Offset Path, to match the other fills.
STEP 17
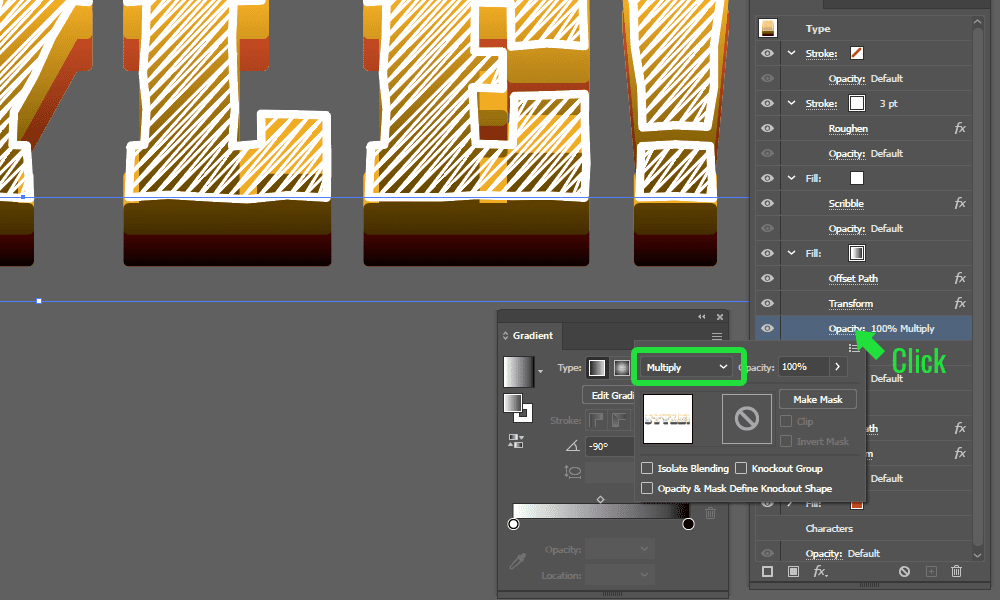
Set the Opacity to Multiply.
STEP 18
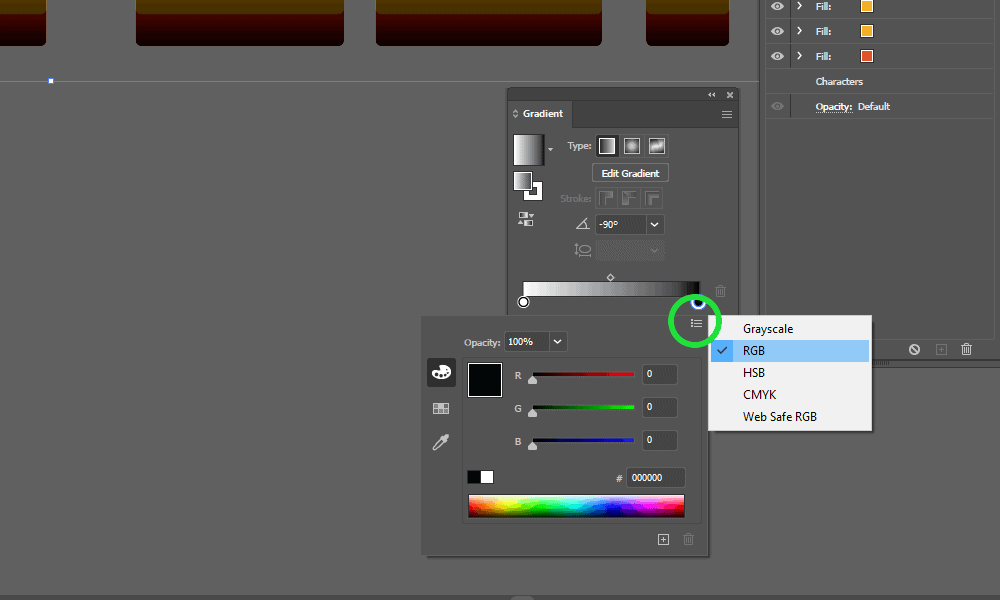
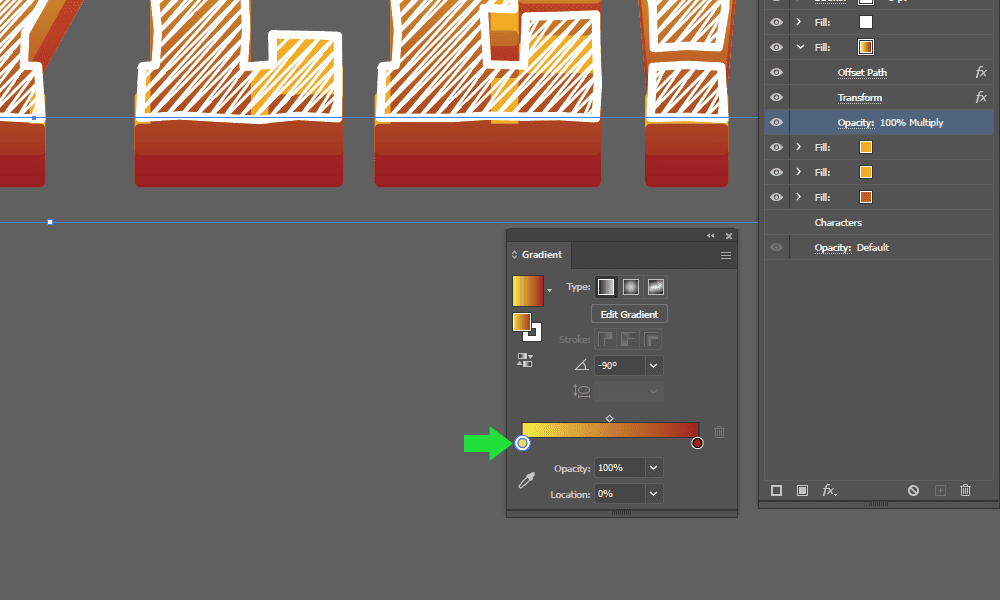
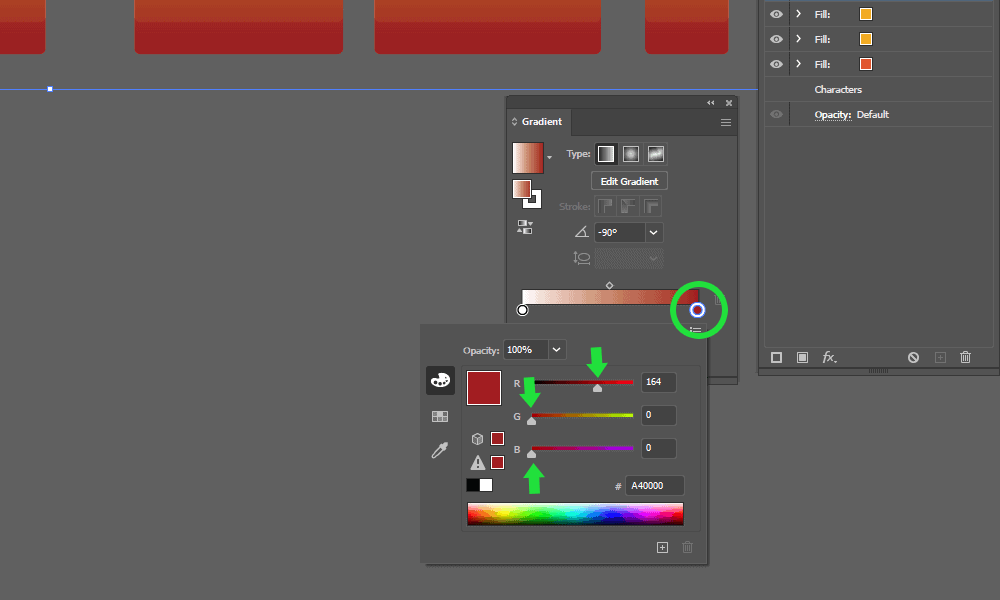
Change the colors of the gradient to warmer colors.
This adds mood lighting to the text and removes that muddiness the white-to-black gradient makes.
STEP 19
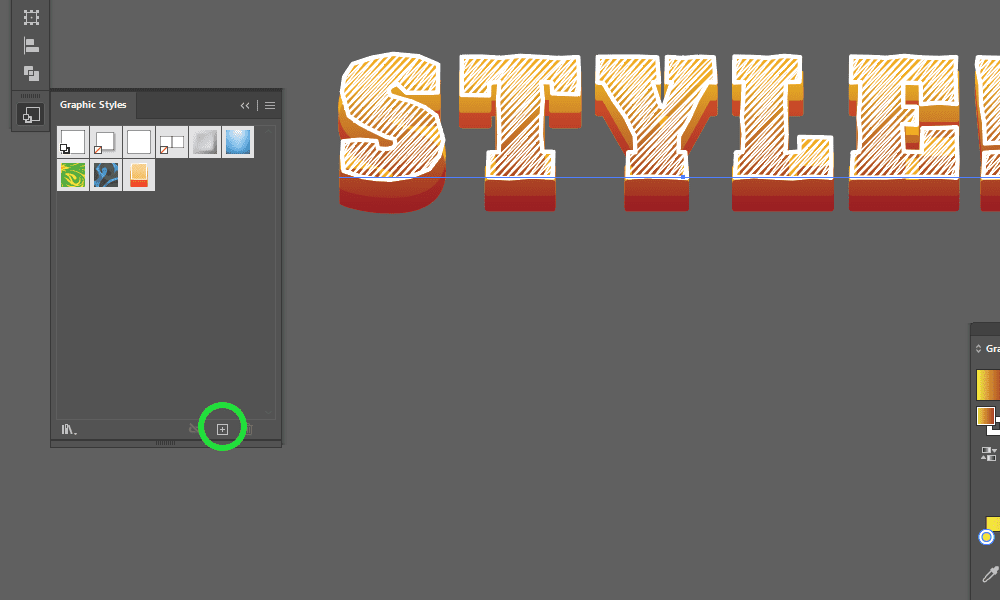
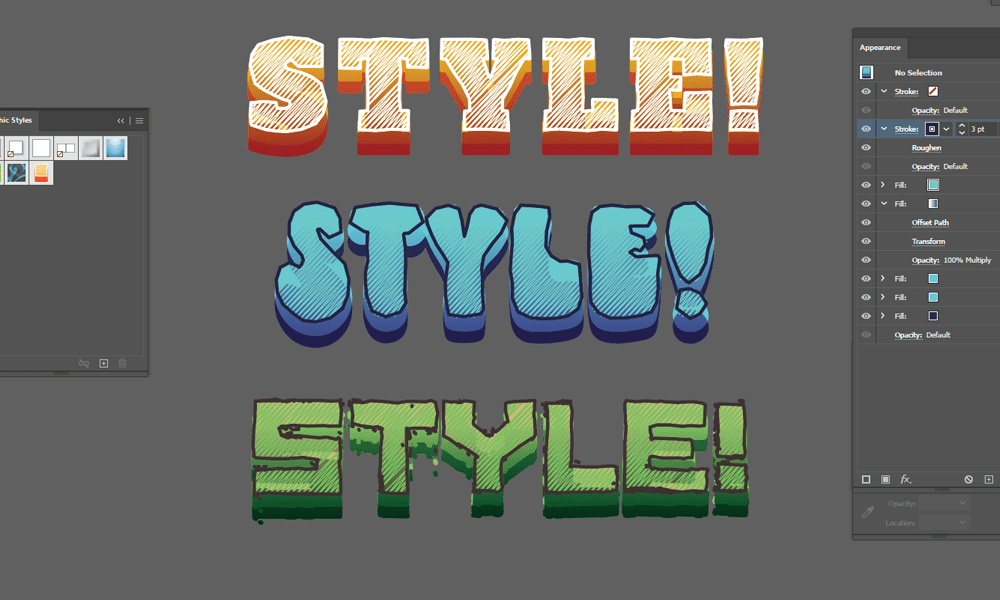
Open the Graphic Styles panel and add the new effect to it. You can now save it to use it later, too.
Go to Window -> Graphic Style to toggle the panel.
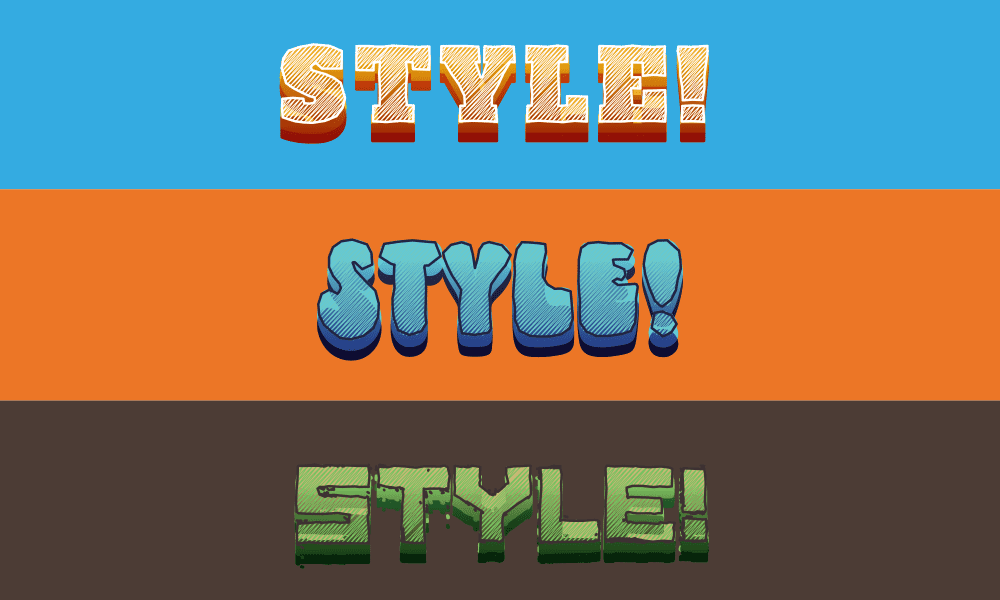
You can now explore multiple color variations and fonts without doing the same amount of work all over again.
